Directions
In this example a user may enter any start and destination location
She/he will receive an email with detailed direction instructions attached in a printable PDF file.
Get your free copy of the Get Directions Application.
Getting started
To run this example, please make sure that the Ultradox Trigger and the Ultradox Template Editor Add-ons are properly installed.
After you have logged in to Ultradox and copied the example to Google Drive, you will find a number of files in the project folder:
Open the project folder on google drive
In the project folder you will find one Word Document: Directions Template. This document is used to generate the ...
The Google Form Document Directions Form is used to ...
The red Directions file is the Ultradoc that contains all the actions to be performed whenever a user submits the form. If you have just copied the example you have this file open right now and will see all the configured actions on the left.

Activation
After you have copied the example, the form will not trigger your Ultradox when users submit the form.
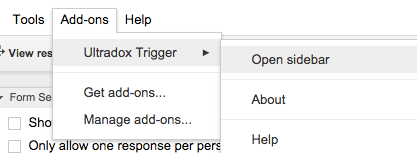
To activate the trigger, open the Spreadsheet and launch the Ultradox Trigger from the Add-ons menu.
In the Google Sheet you will find an Add-on menu that allows you to open the Ultradox Trigger sidebar.
If you do not see the Ultradox Trigger submenu, click on Get add-ons... , search and install the Ultradox Trigger Add-on.
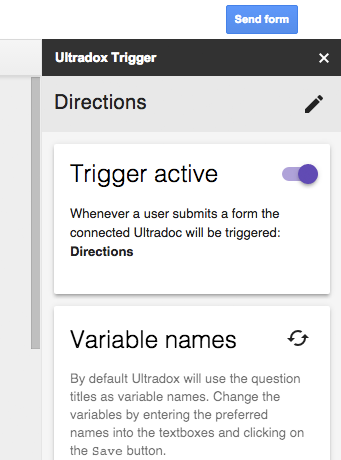
In the sidebar you will find a section where you can activate or deactivate the trigger. If you activate your very first trigger, you will have to grant access to the script that manages the triggers.
Once the trigger is enabled, you can go to the live form by clicking on Form -> Go to live form to test if everything runs as expected.
Fill out the form and use your own email address to find the order confirmation and invoice in your inbox. In the spreadsheet you will find the order as soon as the user submits the form.
When generating the invoice the spreadsheet row containing the order will be updated so that you can find a link to the generated invoice and the date when the confirmation mail has been sent out.

The Ultradox Trigger not only allows you to run the configured actions whenever a user submits the form.
You can also run the actions by simply selecting a single row or multiple rows and click on the run icon.
This is not only useful for testing but also great, if you want to send out newsletters to your customers, re-generate invoices etc.
This example is using a SmartLink that can be used to track whenever a user clicks on a link in the confirmation mail.
The confirmation email contains a link to a special offer. Whenever the user click on that link the spreadsheet will immediately update and show the timestamp when a clicked on the link.
Questions and Feedback
If you have any comments on this guide, feel free to add them right to the Google document that we are using to create this site.
If you are not yet member of the Ultradox community on Google+, please join now to get updates from our end or to provide feedback, bug reports or discuss with other users.
Last Updated: 11/21/16


